
Quick Listen:
When it comes to upgrading your boat, one of the most impactful improvements you can make is installing high-quality marine flooring. Marine mats not only provide an aesthetic upgrade but also enhance safety, reduce noise, and protect your boat's surfaces. Whether you're a seasoned boat owner or a first-time DIYer, installing marine mats can seem like a daunting task. However, with the right guidance, tools, and attention to detail, you can achieve flawless results and enhance your vessel with minimal effort.
This step-by-step guide is designed to help you through the entire DIY marine mat installation process, ensuring you can install custom-fit marine flooring with confidence. By the end of this article, you'll have the knowledge to create a professional-looking installation that lasts.
Why Choose Marine Mats for Your Boat?
Before diving into the installation process, it's essential to understand why marine mats are a great choice for boat flooring.
- Durability: Marine mats are designed to withstand harsh conditions like saltwater, UV exposure, and extreme temperatures. They resist wear and tear from foot traffic, water, and other environmental factors.
- Safety: Marine mats are slip-resistant, reducing the chances of accidents on wet or slippery surfaces. This makes them an excellent choice for areas that get wet, such as the deck, cockpit, and swimming platform.
- Comfort: Marine mats are soft underfoot, providing comfort for long hours spent on the water. They also reduce vibrations and noise, contributing to a quieter and more comfortable boating experience.
- Aesthetic Appeal: Marine mats come in various colors, patterns, and textures, allowing you to personalize your boat and give it a sleek, modern look.
Materials Needed for DIY Marine Mat Installation
Before you start, make sure you have all the necessary materials and tools. Here's what you'll need for the installation:
- Marine Mat Rolls or Pre-Cut Mats: Choose mats that are designed for marine environments and are easy to cut to size if necessary.
- Measuring Tape: To accurately measure the area to be covered.
- Utility Knife or Scissors: To cut the mats to the required size and shape.
- Adhesive: Most marine mats come with adhesive backing, but you might need additional marine-grade adhesive to ensure the mats stay securely in place.
- Squeegee: To smooth the mats and eliminate air bubbles after installation.
- Cleaning Supplies: You'll need a cleaning solution, a scrub brush, and a clean cloth to prepare the surface of your boat.
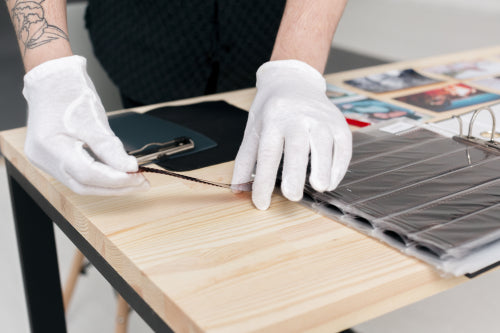
- Safety Gear: Wear gloves and safety glasses while cutting the mats and handling adhesives.
Step 1: Measure the Area to Be Covered
Accurate measurements are the key to a successful installation. To begin, carefully measure the areas where you plan to install the marine mats. This could include the cockpit, deck, or swim platform. You can use a measuring tape to capture the length and width of each section.
Tip: Measure Twice, Cut Once
It's always a good idea to double-check your measurements before cutting. Also, be sure to take into account any curves or corners. Marine mats can be easily cut to fit irregularly shaped spaces, but precision is essential for a clean, seamless look.
Step 2: Clean the Boat Surface
Before installing the mats, it's crucial to thoroughly clean the surface of your boat. The mats must adhere properly, and dirt, grime, or old adhesive will prevent the mat from bonding correctly.
- Use a cleaning solution suitable for your boat's surface (such as mild soap and water or a specialized boat cleaner).
- Scrub the surface with a brush to remove dirt, algae, and other debris.
- Rinse the area thoroughly and wipe it dry with a clean towel. If you're working with a large area, it may be helpful to use a marine-grade degreaser to remove any stubborn oils or residue.
Step 3: Cut the Mats to Size
Marine mats typically come in large rolls or pre-cut sections, and you'll need to trim them to fit the specific areas of your boat. Depending on your boat's shape, this may require cutting curves or adjusting the edges to fit around obstacles.
- Lay the mat on the area where it will be installed.
- Using a utility knife or sharp scissors, carefully trim the mat to fit the measured dimensions.
- If you need to make cuts around irregular shapes or curves (such as around hatches or drain plugs), use a template or a marker to outline the cut lines before trimming.
Tip: Use a Straightedge for Clean Cuts
For straight cuts, use a ruler or straightedge to guide your utility knife. For curves, make multiple smaller cuts rather than trying to cut in one go to avoid jagged edges.
Step 4: Apply the Adhesive
Once your mats are cut to size, it's time to apply the adhesive. Some marine mats come with adhesive backing, which simplifies the process. However, if your mats don't have this feature, or if you want extra durability, you can apply marine-grade adhesive to the back of the mat.
- Start by peeling off the backing of the adhesive (if applicable) or apply a thin, even layer of adhesive to the surface of your boat.
- Position the mat carefully, ensuring it aligns with your measurements and the surrounding edges.
- Press the mat firmly into place, starting from one side and working your way across. This will help prevent air bubbles from forming.
Step 5: Secure the Mat and Smooth It Out
After applying the mat, use a squeegee to press it down and eliminate any air bubbles or wrinkles. This ensures a smooth, even surface and improves the adhesive bond.
- Work from the center of the mat outwards, using the squeegee to press down evenly.
- If any bubbles persist, use a pin or small needle to puncture the bubble and press the air out with the squeegee.
Tip: Avoid Walking on the Mat Immediately
Allow the adhesive to fully bond before walking on the mat. This will give it time to set and ensure a strong, long-lasting bond.
Step 6: Trim the Edges and Final Adjustments
Once the mats are secured in place and the adhesive has set, you may notice small overhangs or rough edges along the perimeter. Use a utility knife to carefully trim these edges for a clean finish.
- Run the utility knife along the edges to remove any excess mat.
- Make sure all the corners are neatly trimmed to maintain a polished, professional look.
Step 7: Let the Mat Set
Allow the adhesive to cure for the recommended time before exposing the mat to water or heavy use. This will ensure that the mat stays in place and performs at its best.
Common Pitfalls to Avoid
While DIY marine mat installation is relatively straightforward, there are a few common mistakes that can undermine your efforts. Here are some tips to avoid common pitfalls:
- Poor Surface Preparation: Skipping the cleaning step or using an incorrect cleaner can result in poor adhesion. Take time to thoroughly clean and prepare the surface.
- Incorrect Measurements: Always measure twice before cutting. Incorrect measurements can result in mats that don't fit properly or require additional cutting.
- Rushing the Drying Process: Don't rush the adhesive curing process. Allow ample time for the adhesive to set before using the boat to ensure a strong bond.
- Using Low-Quality Adhesives: When in doubt, opt for marine-grade adhesive. Low-quality adhesives might not hold up to the marine environment, leading to peeling mats.
Boat Looks Great
Installing marine mats on your boat is a rewarding DIY project that can greatly enhance both the appearance and functionality of your vessel. By following these steps and taking care to prepare the surface, measure accurately, and allow sufficient curing time, you'll achieve professional-quality results. Not only will your boat look great, but it will also provide a safer, more comfortable experience on the water.
With patience and the right tools, you'll enjoy your newly upgraded boat with its durable, custom-fit marine flooring for years to come. Happy boating!
Disclaimer: This helpful resources content contains personal opinions and experiences. The information provided is for general knowledge and does not constitute professional advice.
You may also be interested in: DIY SeaDek Installation | Decked Out Factory
Can't find customization that's built to last? Decked Out Factory specializes in foam decking for boat decks, cooler tops, truck steps, and SXS mats, designed for both durability and style. With our easy-to-apply Stick-It-Series and the secure Snap-It-Series, transforming your crib and gear is simple and effective. Have it all: Style, comfort and function, customized just for you. Get started on a personalized adventure - start your customization with Decked Out Factory today!
Powered by flareAI.